Showing posts with label 10 Weeks of Christmas. Show all posts

10 Weeks of Christmas: Week 10


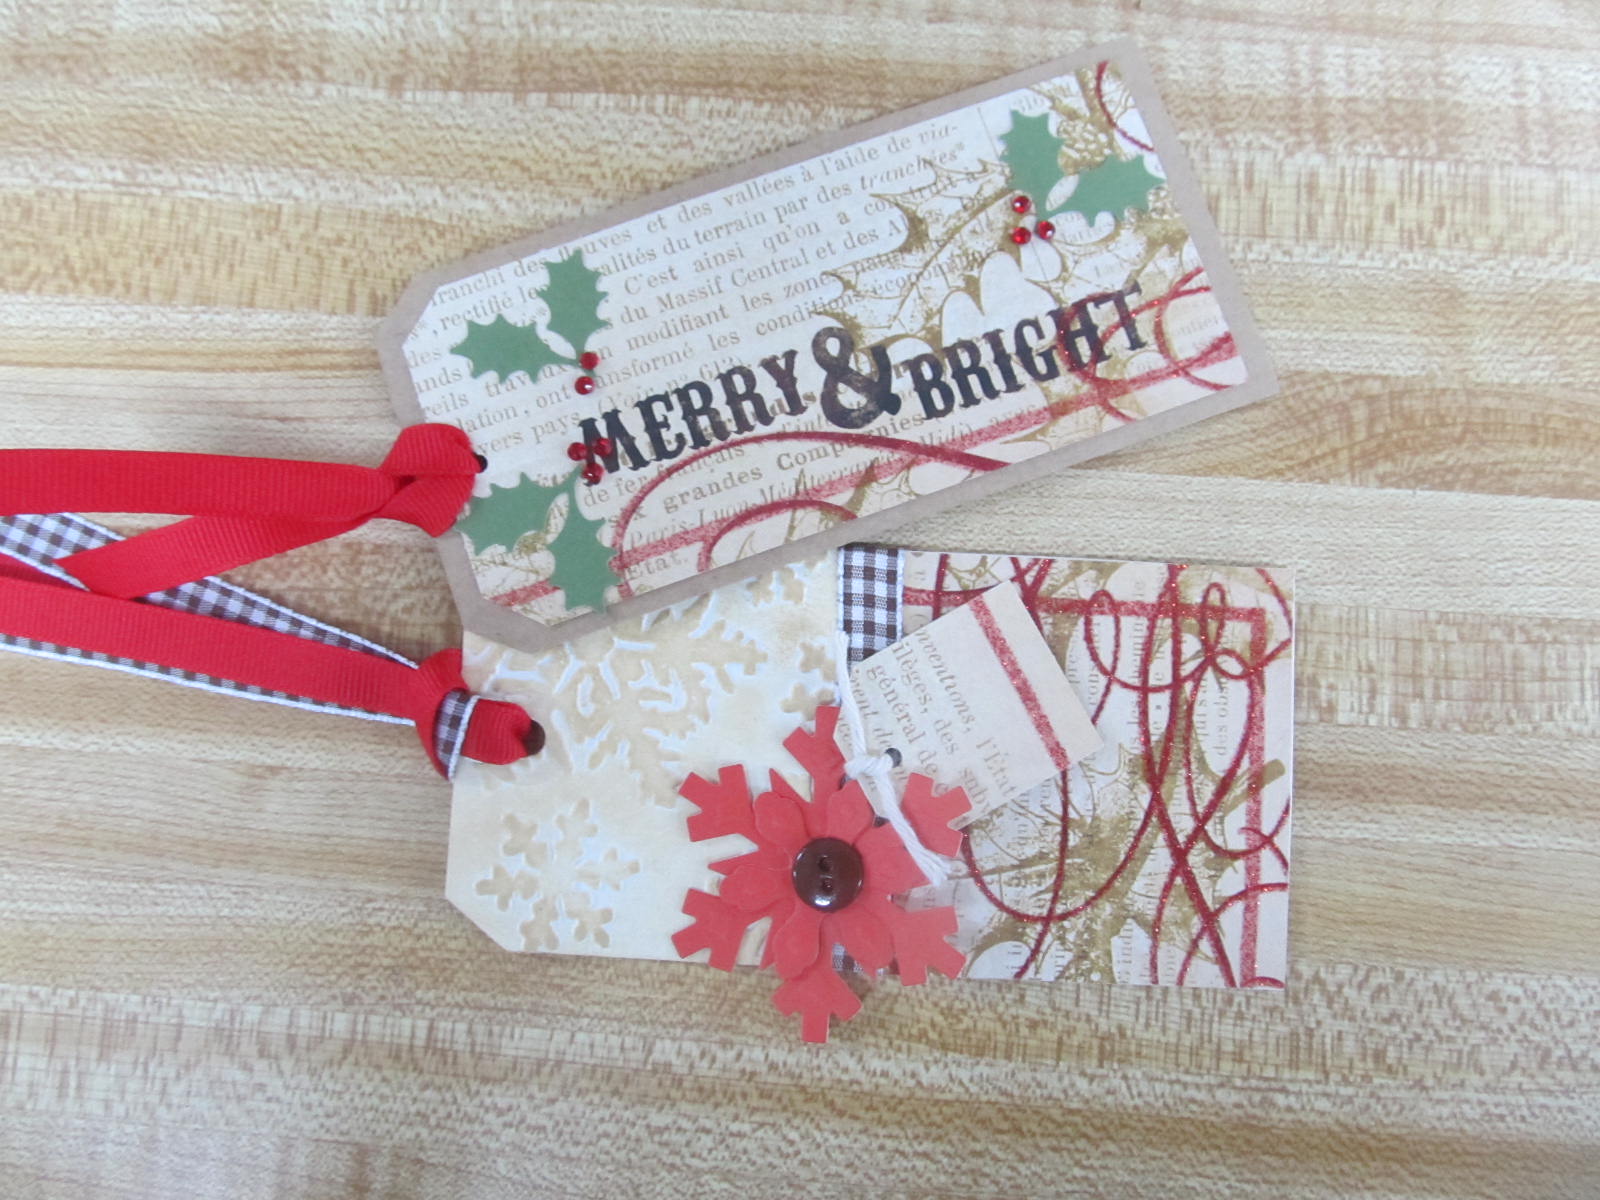
Week 10: Holiday Tags!

We made use of the Cuttlebug and some different embellishments and created these beauties!
Make some to match your wrapping paper!


10 Weeks of Christmas: Week 9


Week 9: Butterfly Frame!

This is such a simple project yet makes such a beautiful gift! 

All you need is a shadow box frame, a butterfly punch and some scrapbook paper.

Add a name in the corner for extra personalization!


10 Weeks of Christmas: Week 8


Week 8: Calendar Card Book!

This is an awesome gift for people that plan ahead for sending any sort of card! 

This is a calendar book where each month has a pocket where you can put any cards you need to send for that month.  We also put a perpetual calendar on the bottom with a line so you can write down your birthdays for the month!

Very easy to make... we just used a larger plain sheet of card stock and folded the bottom up to make the pocket.  Then we decorated the top of the sheet and put the calendar on the bottom.  We spiral bound our book but you could also three hole punch and use (and decorate) rings.  Very customizable!  

It's a great way to keep track of the cards you buy ahead of time 
(so you don't end up buying more than one because you forgot you bought the first one!)


10 Weeks of Christmas: Week 7


Week 7: Post-it Note Holder

This is a little sign holder (5x7 or 4x6 works best).  Usually stand up right like so....


But when you flip it down and decorate it - it becomes a great Post-it Note Holder!
Pretty simple...Size your paper so it will fit in the holder and decorate to your hearts desire, but make sure to leave a space for your post-it notes! 
Check out our samples below!

HINT: if you use a clip on the side it gives the plastic a little more support so it is easier to write on!


10 Weeks of Christmas: Week 6


This weeks project is Christmas Count Down Tin!

This is made with a round tin.  We decorated the bottom of the tin with scrapbook paper, ribbon and letters cut with the Cricut.  Right now we have a paper with a 25 day countdown (day 17 shown).  So what you can do is cut our all the numbers and keep them in the storage part of the tin!
OR you can laminate a piece of white paper and use dry erase markers...
OR you can use chalkboard paint on a piece of card stock and use chalk!
So many ways to make this your own!


10 Weeks of Christmas: Week 5


Week 5: Hot Chocolate Wrap!

This week we have a regular box of hot chocolate wrapped up and ready to give as a gift!
We wrapped it in scrapbook paper.  Added a pocket on the front and dressed it up with ribbon and a bow!
The font pocket is perfect for holding Candy Canes (the stir stick). Or a bag of kisses to add to the hot chocolate.  Use your imagination!


Here is a close up of the saying.

Would work great as appreciation gifts (ie: teacher, mail-person, dog walker)

10 Weeks of Christmas: Week 4


Weeks 4: Holiday Paper Wreath


This wreath was made out of scrapbook paper.  We used strips of paper cut 1 inch wide by 6 inch long.
Fold the strip over and staple the ends.  We cut a piece of cardboard into an 8 inch circle. 
Glue the strips around the circle.  For the next row glue them down just ahead of the previous row. 
You can make it as full as you would like - just add more rows!

For a fun Christmas wreath - put a Christmas bulb in the center!
(Make sure if it is a glass bulb that you really have it glued down good - or it might shatter when it falls off! Experience talking... might just want to stay with a plastic one!)


10 Weeks of Christmas: Week 3


This weeks project is...

Christmas Cards!


These Christmas Cards are simple to make but make a big impression.  The trees are made of scrap paper cut into the appropriate sized triangles and the ornaments are buttons with the strings drawn on.  Add some ribbon and viola! 


10 Weeks of Christmas: Week #2

 
This week we are doing a paper rolled tree.
These can be used on the front of cards, on canvas
or any backing of your choice.


Instructions:
1.  Cut 10 or so sheets of paper, each one about an inch shorter than the previous.
2.  Roll into a tube using a pen or pencil or by hand.
3.  Tape or glue dot the end so it won’t unravel. Stack them up like a tree!
4.  Attach to any backing you choose...canvas, card, shadow box, etc. 


10 Weeks of Christmas: Week 1


Join us in bringing in the Holidays!
We will be presenting 10 weeks of gift ideas for the Holidays. 
The projects may also be available as a kit to
purchase also. 
 Here is week one of the series:
Week 1: Home Decor
This home decor piece was made with
chipboard, background paper as well as
 letters cut from the cricut machine.